
Home Assistant is a great platform but writing automations in yaml can be a bit.. annoying. It especially gets bad once you reach around 4,000 lines in your automations.yaml file.
This is why I have now converted my ~6,000 line automations.yaml file over into the open-source software Node-RED developed by IBM. It is the perfect companion to Home Assistant and acts great as the brains of the operation (plus it's self hosted!). You can also use it for all kinds of other tasks. I'm currently using it at work as a replacement for the ColdFusion Scheduler. We had issues with CF placing HTTP locks in the latest version and since switching to Node-RED we have had zero issues (and my co-workers love it).
It uses block style programming (which in Node-RED they are called "nodes") which in turn makes it super easy to understand and brings a cool visualization into your automation flows. It is also far easier to understand, especially for non-programmers.
Getting started with Node-RED is really simple. I prefer running it inside a docker container but you can get started without docker in a couple easy steps. Once setup access the web portal on the server via port 1880 (something like http://127.0.0.1:1180). I recommend taking a little time to explore and get familiar with things.
Now we need to install the npm package that gives us access to Home Assistant. Navigate to the "Manage Palette" under the top right menu. From here click the "Install" tab and search for "Home Assistant" and click Install on node-red-contrib-home-assistant-websocket (make sure to get the right one). This will fetch the plugin using npm and activate it so you can use it right away.
Once that is installed you should see a Home Assistant drop-down in the node list to the far left of the page. Spend some time hovering over each of them to see what they do (you can also plop one down to view even more information about it). You will need to configure your Home Assistant server by placing one of the nodes down and double clicking it to configure it.
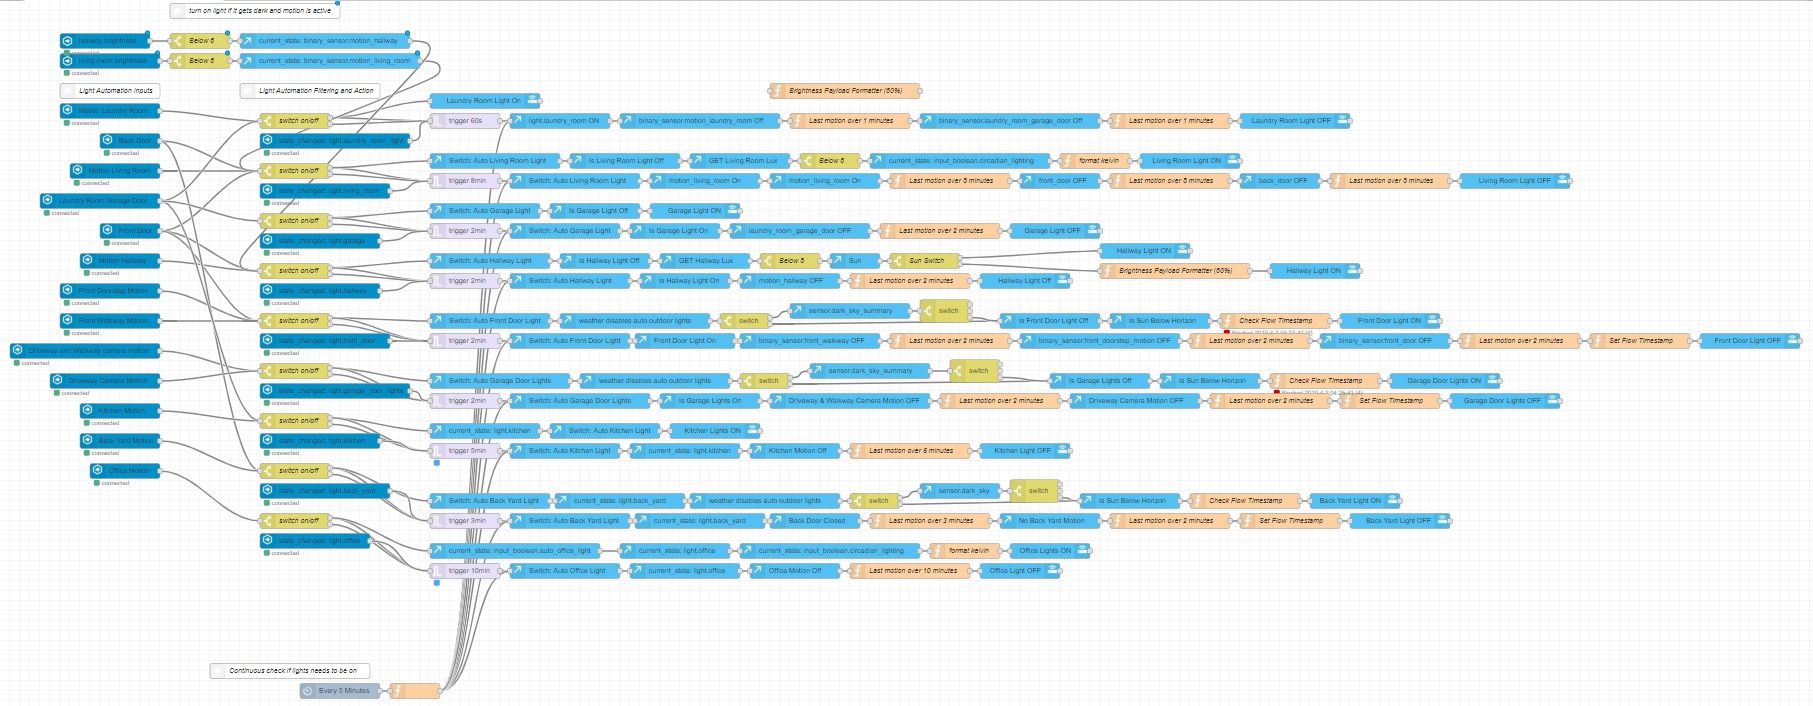
Now that is all done we can start playing around with different flows. Here are some flows that I have come up with over my time using this setup:
- Circadian lighting with Home Assistant and Node-RED
- Dim lights when TV is playing
- Automatic lights based on motion sensors
- Enable/Disable Node-RED flows from the Home Assistant UI
- Hide/Show Chromecast from Home Assistant front-end using Node-RED
- Use security camera motion to trigger lights
I have more coming, don't panic!